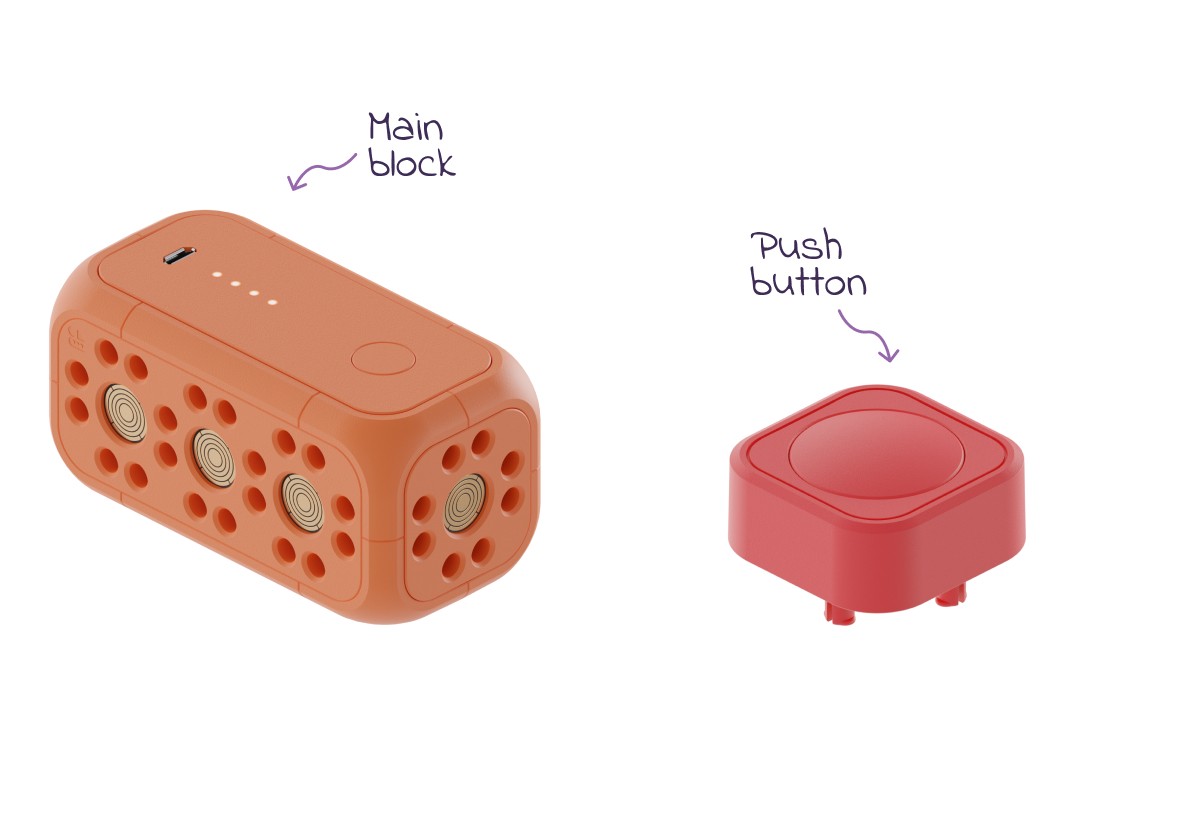
Turn the Main Block on and connect to the Robo Wunderkind App.
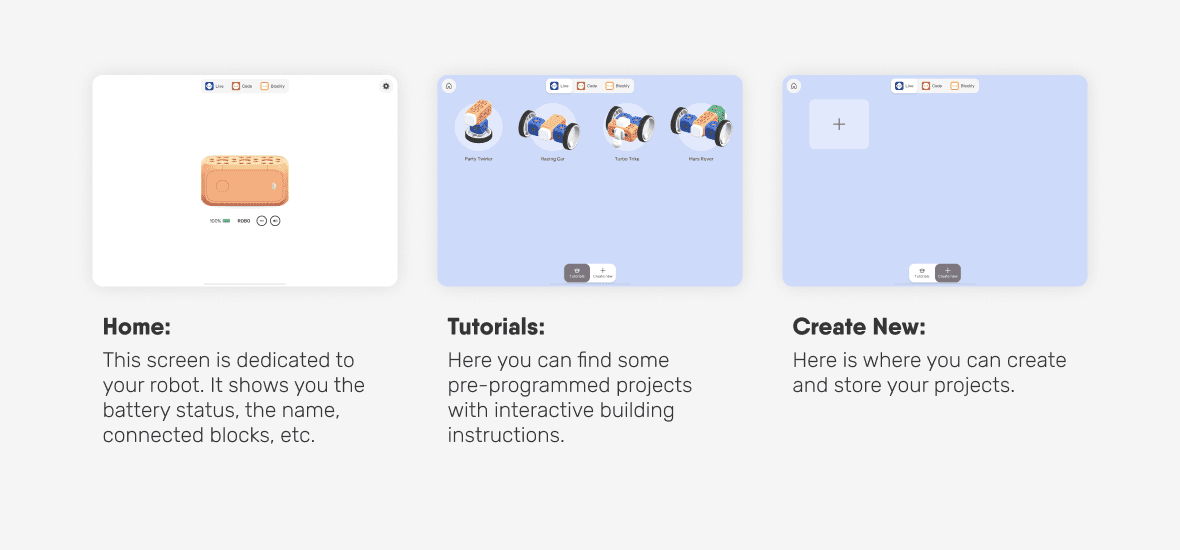
There are 3 Robo tabs to check out
Tap on "+" to create a new project and continue with the tutorial.
2
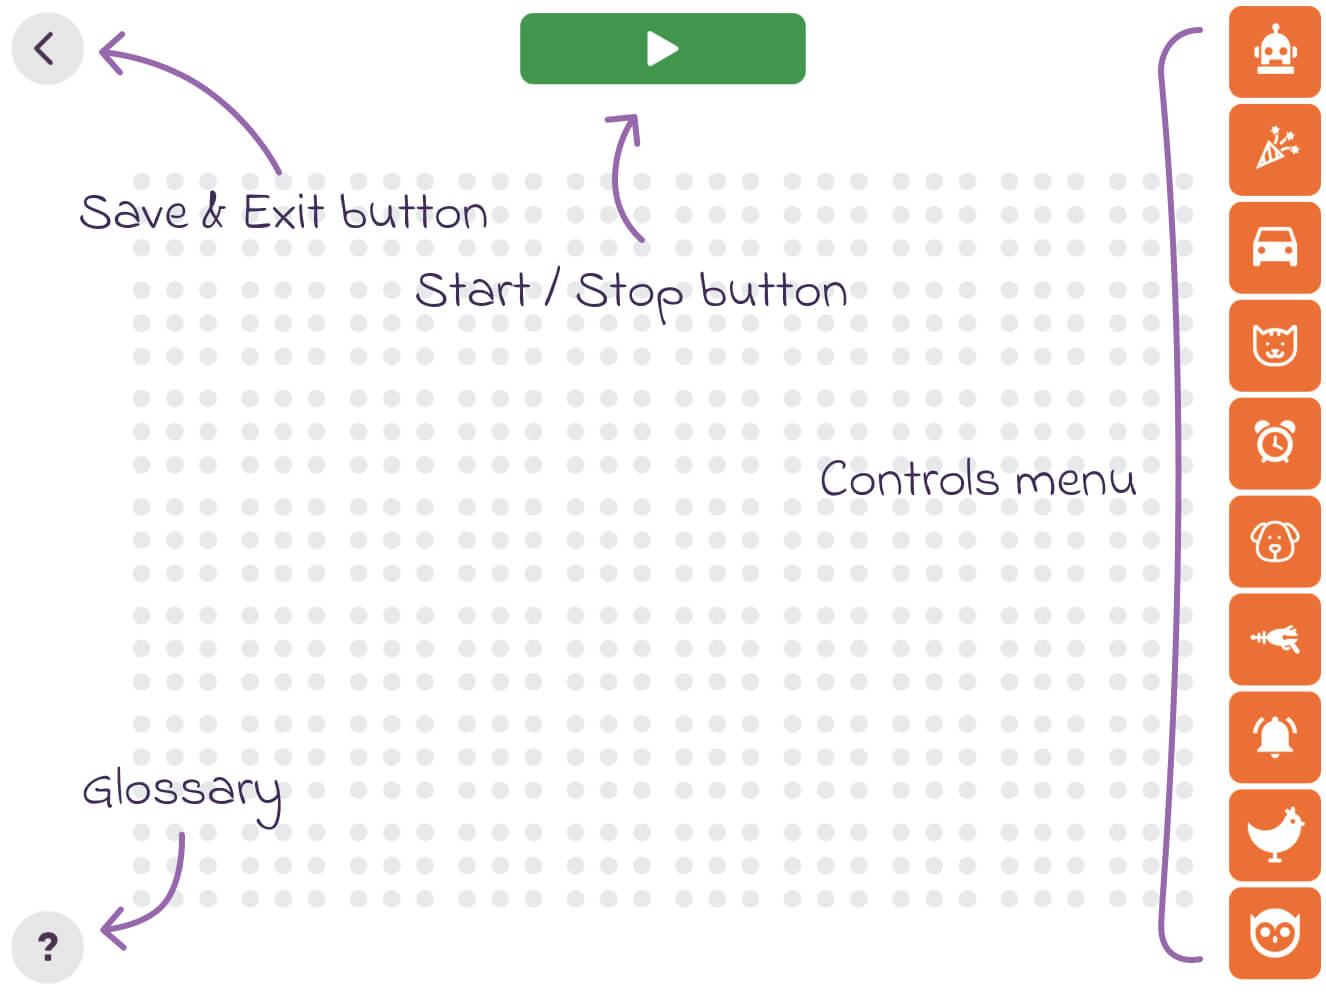
Control Screen & Controls
Welcome to your Control Screen or canvas, here you will find the Controls & buttons.
Play /Stop Button: Press it to go to the Control Mode or return back to the Edit Mode.
Save / Exit Button: Press it to return to My Projects
Controls Menu: Here you can see all Controls available. Controls are the same color as the RW Modules they correspond to.
Glossary: Here you can find all Robo Live Controls and buttons explained
3
Edit & Control Modes
When you create a new project you are in the Edit Mode: You can add and arrange the Controls on the canvas.
Drag & drop some Controls on your canvas and arrange them as you wish.
Try them out!
Press the Play Button to activate the Control Mode. Now you can control your robot using the Controls you have on the canvas by simply pressing on them.
Return to the Edit Mode
Press the Stop Button. Now you can edit your Controls or add more Controls on your screen.
Congratulations, you just created your very first Robo Live Project!
!
Want to know about Robo Live? Continue with these tutorials to learn more about Motors, Servo, Joystick and Tilt Controls, Control Design, Sensors Controls or check out our super fun Robo Live Community Projects.
4
Exiting and saving your project
Press the Save & Exit Button to exit to My Project Screen, your project will be saved automatically.